Key Takeaways
- The easiest way to add a chatbot to a WordPress website is to install the chatbot's own plugin. It takes a few minutes, and you don't need to write any code.
- Create and train your chatbot before you install anything. The plugin only connects the chatbot to your site, so it needs to know your business first.
- Don't paste chatbot code into a post or page. WordPress often strips it out, and even when it stays, the chat window only shows on that one page.
- If your chatbot only gives you embed code, add it with a free header and footer plugin instead of editing your theme files.
- Self-hosted WordPress sites and all paid WordPress.com plans can install plugins. Free WordPress.com sites can't.
- If the chat window doesn't appear, first check that the plugin is activated, then check your caching or speed plugin.
If you run a WordPress site, you've probably noticed the same questions arriving again and again. Customers ask where their order is, whether you ship to their country, and what your return policy says. An AI chatbot can answer those questions for you, day or night, using your own content.
The good news is that you don't need a developer to set one up. In this blog, we'll show you how to add a chatbot to your WordPress website step by step. We'll cover the two installation methods that work for almost any chatbot, walk through a real example with Steps AI, and explain the small mistakes that stop a chat window from showing up.
How to add a chatbot to WordPress: the quick steps
Here's how to add a chatbot to a WordPress website in five steps. The rest of this blog explains each one in detail.
- Create your chatbot and train it on your website content.
- Download the chatbot's WordPress plugin, or copy its embed code.
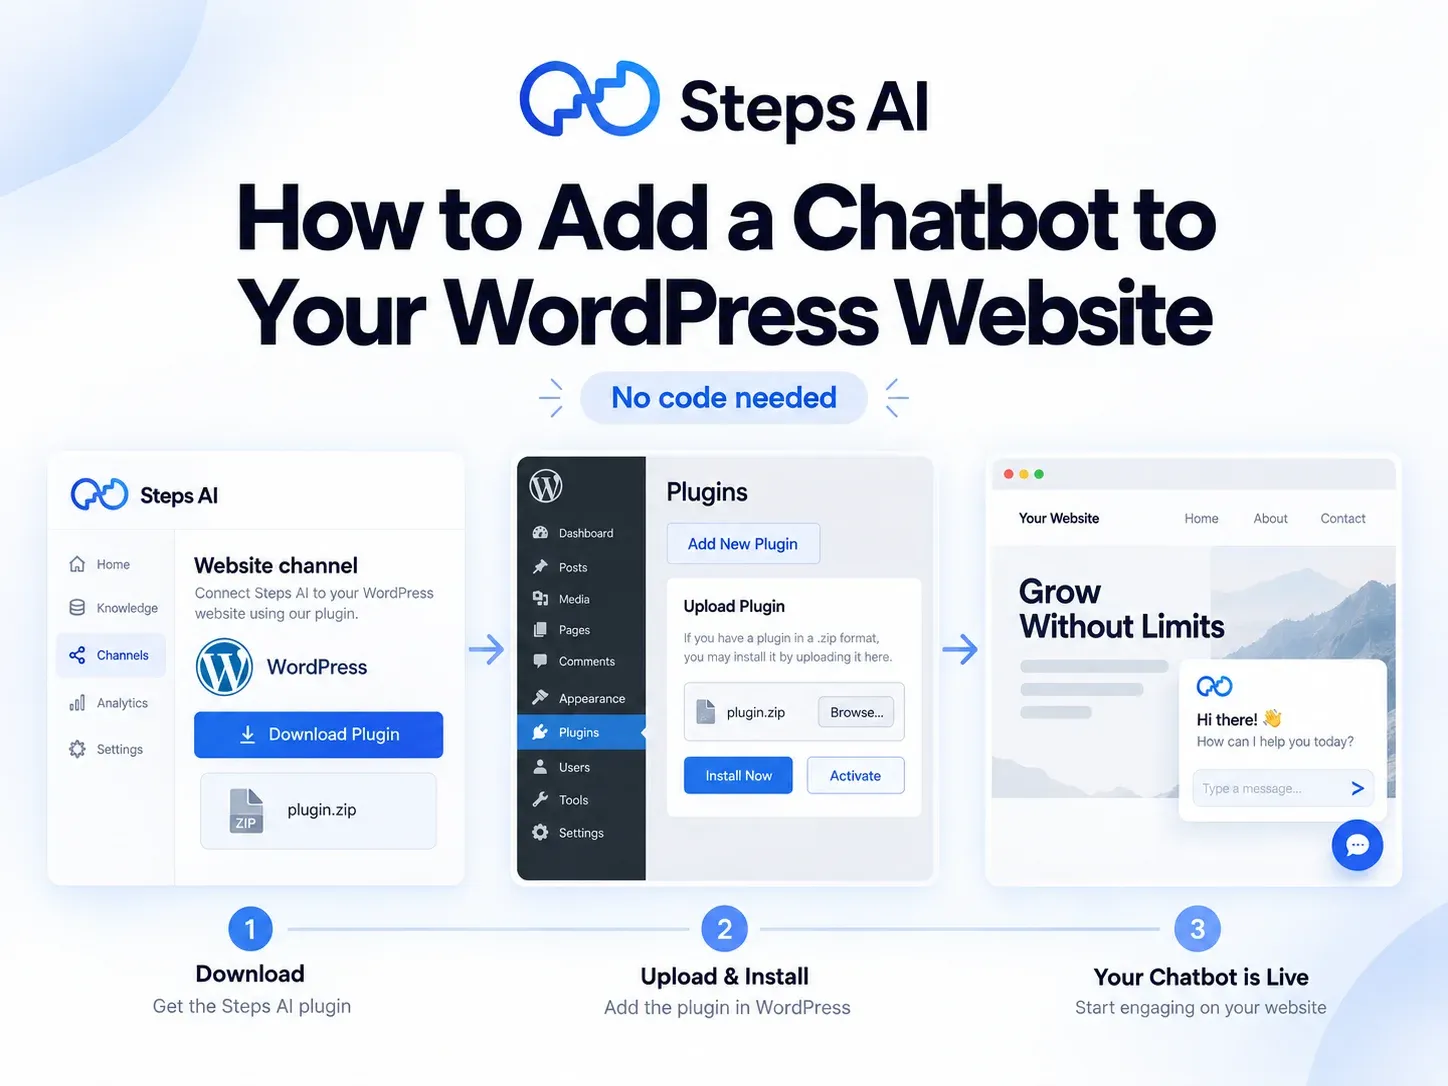
- In your WordPress dashboard, go to Plugins → Add New Plugin → Upload Plugin.
- Upload the zip file, click Install Now, then click Activate.
- Open your site in a private window and check that the chat window appears.
If your chatbot is listed in the WordPress plugin directory, you can search for it by name in step 3 instead of uploading a file.
Before you start: 3 things to check
Most failed installs have nothing to do with the chatbot itself. They come down to how your WordPress site is set up. Checking these three things first will save you a lot of head-scratching later.
Does your WordPress plan allow plugins? (self-hosted vs WordPress.com)
There are two kinds of WordPress, and they work a little differently:
- Self-hosted WordPress (from WordPress.org) runs on hosting you pay for separately. You can install any plugin you like.
- WordPress.com hosts WordPress for you. What you can install depends on your plan.
On WordPress.com, plugins can be installed on every paid plan: Personal, Premium, Business, and Commerce. If you're on a free site, you'll need to upgrade first.
| Your site | Can you install a chatbot plugin? | What to do |
|---|---|---|
| Self-hosted WordPress | Yes | Log in as an Administrator |
| WordPress.com, paid plan | Yes | Check that "Upload Plugin" shows under Plugins |
| WordPress.com, free plan | No | Upgrade to a paid plan first |
Not sure which one you have? If you pay a hosting company separately, you're on self-hosted WordPress. If you pay WordPress.com directly, you're on WordPress.com.
One small caveat: in early 2026, WordPress.com staff confirmed that some people on older subscriptions still saw a message asking them to upgrade. If you see "Requires a plan upgrade" next to plugins, WordPress.com support can sort it out.
Can you log in to your WordPress admin dashboard?
To install a plugin, you need to log in to your WordPress admin dashboard with the Administrator role. For most sites, the login page is yoursite.com/wp-admin.
If an agency or freelancer built your site, you might not have admin access yet. You can ask them for it, or send them this blog. The install only takes a few clicks, so it won't take them long.
If your site is part of a multisite network, which is common with larger organizations, the network's Super Admin controls some settings. In that case, ask them to handle the install.
Does your chatbot offer a WordPress plugin?
Chatbots connect to WordPress in one of two ways:
- A plugin: You either find it in the WordPress plugin directory or download it as a zip file from the chatbot's website. This is the easiest option.
- Embed code: This is a short piece of code, called a script, that you add to your site. It works well, but it takes a bit more care.
Look for a WordPress option in your chatbot's dashboard or help docs. Steps AI gives you a plugin that's already set up with your account key, so there's nothing to copy or paste. We'll walk through it in Step 2. And if your site isn't on WordPress, our guide to setting up a chatbot on your website covers other platforms.
Step 1: Create your chatbot and train it on your own content
This step surprises a lot of people. If you search for how to create a chatbot in WordPress, you might expect to build it inside WordPress. With most modern tools, you don't. You create the chatbot in the chatbot tool, teach it about your business, and then connect it to your site.
It helps to know how today's chatbots differ from older ones. Older chatbots were rules-based, so you had to write out every question and answer by hand, a bit like a phone menu. An AI chatbot reads your own content and uses it to answer questions in plain language, even when website visitors word things in a way you didn't expect. The technical name for this is retrieval-augmented generation (RAG), which simply means the chatbot looks up your information before it answers.
You don't need any technical skills to train AI this way. Here's what to give your chatbot to learn from:
- Your website pages, especially your FAQ, shipping, returns, and contact pages
- Product details, if you run an e-commerce store
- Documents like price lists, guides, or policy PDFs
- Written answers to your most common queries
Pro tip: write down the 10 questions customers ask you most. Then check that the answer to each one exists somewhere your chatbot can read. If it doesn't, add it. Your chatbot can only be as accurate as the information you give it.
With Steps AI, you paste your website URL, and our agent reads your pages, documents, and FAQs to build its knowledge base. You can also upload files and connect Google Drive or Notion so your business data stays current. Most people are live in about five minutes. When you see your own pages appear in the knowledge base, that's a good sign the agent will answer from your content instead of guessing.
If you sell on WooCommerce, our guide to adding an AI chat agent to a WooCommerce store covers store-specific setup.
Step 2: Install the chatbot on your WordPress site
Once your chatbot knows your business, it's time to put it on your WordPress site. Choose the option that matches what your chatbot gives you.
Option A: Upload or install the chatbot plugin (recommended)
An AI chatbot plugin for WordPress is the simplest and safest way to add a chatbot. You can install the plugin in one of two ways.
From the WordPress plugin directory:
- In your WordPress dashboard, open the Plugins section in the left-hand sidebar.
- Click Add New Plugin.
- Type your chatbot's name into the search bar.
- Click Install Now, then click Activate.
By uploading a zip file:
- Download the plugin's zip file from your chatbot's dashboard.
- In WordPress, go to Plugins → Add New Plugin, then click Upload Plugin at the top of the page.
- Choose the zip file and click Install Now.
- Click Activate.
Uploading is also your backup plan. If installing from the directory fails, download the zip file from the plugin page and upload it manually instead.
One thing to watch for: WordPress needs the zip file itself, not an unzipped folder. Some browsers, like Safari on Mac, unzip downloads automatically. If that happens, turn off that setting and download the file again.
After you click Activate, many chatbot plugins add a new menu item to your WordPress sidebar. Some ask you to paste an API key or chatbot ID into the plugin settings before the chat window appears. That key is what links the plugin to your chatbot account, so copy it carefully.
We recommend this method because plugins don't touch your theme. Your chatbot keeps working when you update or change your theme, and the plugin updates just like the rest of your plugins.
Example: Adding Steps AI chatbot (download, upload, activate)
Here's what Option A looks like with Steps AI. It follows the same process as any zip-file plugin, with one difference: you never have to paste a key.
- Download the plugin: In your Steps AI dashboard, open your agent, go to the website channel, and choose WordPress. Click Download Plugin. The plugin comes pre-filled with your client key, which is how it knows which agent to show on your site.
- Upload it to WordPress: In your WordPress admin, go to Plugins → Add New Plugin → Upload Plugin. Select the zip file and click Install Now.
- Activate it: Click Activate once the upload finishes.
Once the plugin is activated, the Steps AI agent appears on your WordPress site. There's no settings page to fill in and no code to touch. Any changes you make later, such as editing the welcome message or adding new content, happen in your Steps AI dashboard and show up on your site automatically.
You won't find our plugin by searching the WordPress plugin directory, because each download is set up for your account. We built it this way because WordPress strips script code pasted into posts and pages, so a copy-paste snippet won't work there. We'll explain why below.
Option B: Paste the embed code with a header and footer plugin
Some chatbots don't offer a plugin and give you embed code instead. It's usually a short script that starts with <script>. The safest way to add it is with a free header and footer plugin such as WPCode.
Here's how:
- Go to Plugins → Add New Plugin, search for WPCode, then install and activate it.
- Copy the embed code from your chatbot's dashboard.
- In WordPress, go to Code Snippets → Header & Footer.
- Paste the code into the Body or Footer box, following your chatbot's instructions.
- Click Save Changes.
Code added this way loads on every page of your site. It also stays in place when you update or switch themes, which is why we suggest it over editing theme files.
If you're using Steps AI, stick with the plugin in Option A. It's the method we support for WordPress.
Why pasting code into a post, page, or theme file fails
This is the mistake we see most often. It's tempting to paste embed code straight into a page with a Custom HTML block, or into your theme files. Here's why that usually goes wrong.
In posts and pages
WordPress removes script code unless the person saving the page has a special permission called "unfiltered HTML." On a normal WordPress site, only Administrators have it, and on a multisite network only the Super Admin does.
Security plugins can strip scripts too, even for Administrators. And if someone without that permission edits the page later, WordPress removes the code when they save. Even if the code survives all of that, your chatbot will only appear on that single page.
In theme files
Editing files like header.php works until your theme updates. Then your changes get overwritten, and your chatbot quietly disappears. A single typo in a theme file can also break your whole site.
Step 3: Customize how your chatbot looks and talks
Your chatbot is live, but a few settings make a real difference to how visitors feel about it. This step is about making the chatbot feel like part of your team.
Set the chatbot's tone and welcome message
Start with the chatbot's tone. It should sound the way you already talk to customers. A bakery can be warm and casual, while a law firm will want something calmer and more formal.
Next, write the welcome message. "Hi, how can I help?" works, but it doesn't tell visitors what the chatbot can actually do. Something like "Hi, I can help with orders, shipping, and returns. What do you need?" is more useful. A clear, personalized message makes it easier for visitors to start a conversation.
On our paid plans, you can create a custom persona for the Steps AI agent, set its tone, and control how it behaves. Part of that is setting guardrails, which are things the agent must never do, like quoting prices, giving medical or legal advice, or discussing topics outside your business. If you've ever worried an AI assistant might embarrass you, guardrails are how you prevent it.
Add suggested questions visitors can tap
Most people skip this setting, and it's one of the most useful. When visitors don't know what a chatbot can do, they often don't ask anything at all. Suggested questions fix that. They're buttons in the chat window that visitors can tap instead of typing.
Pick questions from your real customer inquiries, such as:
- "Where's my order?"
- "Do you ship to my country?"
- "What's your return policy?"
Steps AI lets you add up to five quick questions, and the answers come from your knowledge base rather than a fixed script. These buttons guide users straight to instant answers, which is one of the easiest ways to enhance user engagement.
Choose where and when the chat window appears
Three settings shape how your chat window fits into your site:
- Placement: Choose which corner the chat window opens from, match the colors to your brand, and upload your logo.
- Timing: A chat window that pops up the second someone lands can feel pushy. Letting it appear after a few seconds is a friendlier way to engage visitors.
- Style: Some tools offer an inline search bar instead of a floating bubble, which suits sites that want help available without a pop-up.
In Steps AI, you set desktop and mobile separately and choose from nine positions. The agent can appear right away or after 5, 10, 30, or 60 seconds. You can also pick a floating chat widget or an inline search bar, a light or dark theme, and your own colors.
Step 4: Set up lead capture and handoff to your team
No chatbot can answer everything, and nobody's online around the clock. This step decides what happens in those moments.
Capture leads outside regular business hours
When your team is offline, a chatbot can still capture leads for you. Say a visitor asks about a bulk order at 11 p.m. The chatbot can answer what it can, then ask for their name and email so you can follow up in the morning.
Contact form submissions work differently. The visitor fills out the form and waits, often with their question still unanswered. A chatbot gives them real-time assistance first and collects their details second, which is why chatbots are so useful for lead generation.
Most tools can email you when a new lead comes in, save potential leads to a lead list, or send them to your CRM. If you take bookings, look for a calendar connection too.
Our agent collects details naturally during the conversation and attaches the full chat to each lead, so you know exactly what the person asked. Leads move through a simple pipeline (New, Contacted, Qualified, Converted), and you can sync them to HubSpot. If you book calls or appointments, you can connect Google Calendar or Calendly so visitors can pick a time inside the chat.
Pass tricky questions to your support team
Decide early which questions should always go to a person. Refunds, complaints, custom quotes, and anything sensitive usually belong on that list. A chatbot that answers FAQs but can't pass conversations to your customer support team leaves frustrated customers with nowhere to go.
Good handoff also means your team sees the whole conversation, so customers don't have to repeat themselves.
When our agent hands off a conversation, it waits a set time, from 10 seconds up to 2 minutes, for someone on your team to accept. If nobody does, it shows a fallback message you've written and emails the people you've chosen. You then pick up the conversation from your Steps AI inbox, with the full conversation history in front of you.
Our guide to how customer support chatbots work with human agents goes deeper on getting this balance right.
Step 5: Test your chatbot before visitors see it
Before you tell anyone about your new chatbot, spend a little time testing it. It doesn't take long, and it catches most problems before your customers do.
- Open your site in a new private or incognito window. This shows your site the way visitors see it, without being logged in and without old cached pages.
- Ask your 10 most common questions. Check every answer, especially prices, delivery times, and policies.
- Ask something it shouldn't know. A good chatbot says it isn't sure and offers to connect you with a person. A confident made-up answer usually means it needs better information or tighter guardrails.
- Ask a follow-up question, like "What about international orders?" A good AI-powered chatbot should remember what you were talking about.
- Test lead capture and handoff from start to finish, and make sure the email notification actually arrives.
- Check it on your phone. The chat window should open smoothly and shouldn't cover anything important.
- Check your page speed. Heavy chatbot scripts can slow a site down, so run your site through Google PageSpeed Insights before and after installing.
We'd much rather our agent say "I don't know" than give a customer the wrong answer, and you should expect the same from any chatbot you use.
Testing doesn't stop once you launch. Read through real conversations every week, because these user interactions are the simplest form of feedback collection you'll find.
The questions your chatbot missed show you exactly what to add to its knowledge base, and this kind of customer feedback gives you valuable insights into what people want from your site. In Steps AI, analytics show your most frequently asked questions and where visitors drop off.
Our chatbot best practices guide includes a full test script you can follow.
Chatbot not showing up? How to fix common problems
If you've activated your chatbot and still can't see it, don't worry. It's almost always one of these four things.
| What you see | Most likely cause |
|---|---|
| No chat window anywhere | The plugin isn't activated, or your site is showing an old cached page |
| The chat window appears only after you scroll or tap | A caching or speed plugin is delaying scripts |
| Two chat bubbles, or none at all | Another chat plugin is conflicting |
| The bubble covers buttons on phones | Mobile position settings |
The plugin isn't activated
Go to Plugins → Installed Plugins and find your chatbot.
If you see an "Activate" link under its name, click it. If the plugin asked for an API key, make sure it's pasted into the plugin settings.
Then clear your site's cache and reload the page in a private window.
A caching or speed plugin is hiding it
Speed plugins make your site load faster, but some of their settings can hide your chatbot. For example, WP Rocket's "Delay JavaScript execution" setting holds back scripts until the visitor scrolls, taps, or moves the mouse, so the chat window can show up late or not at all.
To fix it, exclude your chatbot's script from that setting. WP Rocket has one-click exclusions for common plugins. In other speed plugins, look for settings named "delay JavaScript" or "defer JavaScript." Afterward, clear every cache, including your host's cache and Cloudflare's if you use it.
Another chat plugin is conflicting with it
If you've tried other chat tools before, an old plugin may still be active. Two chat widgets can overlap or block each other, so deactivate the one you're not using.
It's also worth checking your cookie consent banner. Some banners block scripts until a visitor clicks "Accept," so test again after accepting.
The chat bubble covers buttons on mobile
On small screens, a chat bubble can sit right on top of your add-to-cart or menu button. That costs you sales instead of helping. Move the bubble to a different corner on mobile, or have it appear a few seconds later. In Steps AI, mobile position and timing are set separately from desktop, so you can fix phones without changing anything on desktop.
Want to see how an AI agent handles your own customer questions? Try Steps AI. It's free to start, there's no card needed, and you can cancel any time.
Frequently Asked Questions
Can I add a chatbot to WordPress for free?
Yes. Many chatbot plugins offer a free version, with extra features in a paid pro version. Free plans usually limit how many replies you get or which features you can use. Steps AI has a permanent free plan with no card required, so you can test how well it answers from your own content.
Do I need an OpenAI API key to add an AI chatbot?
It depends on the chatbot. Plugins that run the AI inside WordPress, like WPBot, use your own OpenAI API key, and you pay the AI provider directly for usage. All-in-one tools include the AI in their price, so there's no key to manage. Steps AI works this way.
Will a chatbot slow down my WordPress site?
A well-built chatbot shouldn't noticeably slow your site. Good chat widgets load after your page content, so visitors see your site first. Steps AI's widget is lightweight and lazy-loaded. To be sure, test your speed with Google PageSpeed Insights before and after installing, and don't run two chat plugins at once.
How long does it take to add a chatbot to WordPress?
The install itself takes about two minutes: download the plugin, upload it, and click Activate. Training depends on how much content you have. With Steps AI, most people are live in about five minutes. Leave extra time to customize and test before you share it with customers.
Which AI chatbot is best for a WordPress website?
The best chatbot for a WordPress website learns from your own content, offers a WordPress plugin, hands off to a human when needed, and has pricing you can predict. If you want low costs and don't mind managing API keys, a bring-your-own-key plugin can work. If you want it running today with no setup, choose an all-in-one tool.